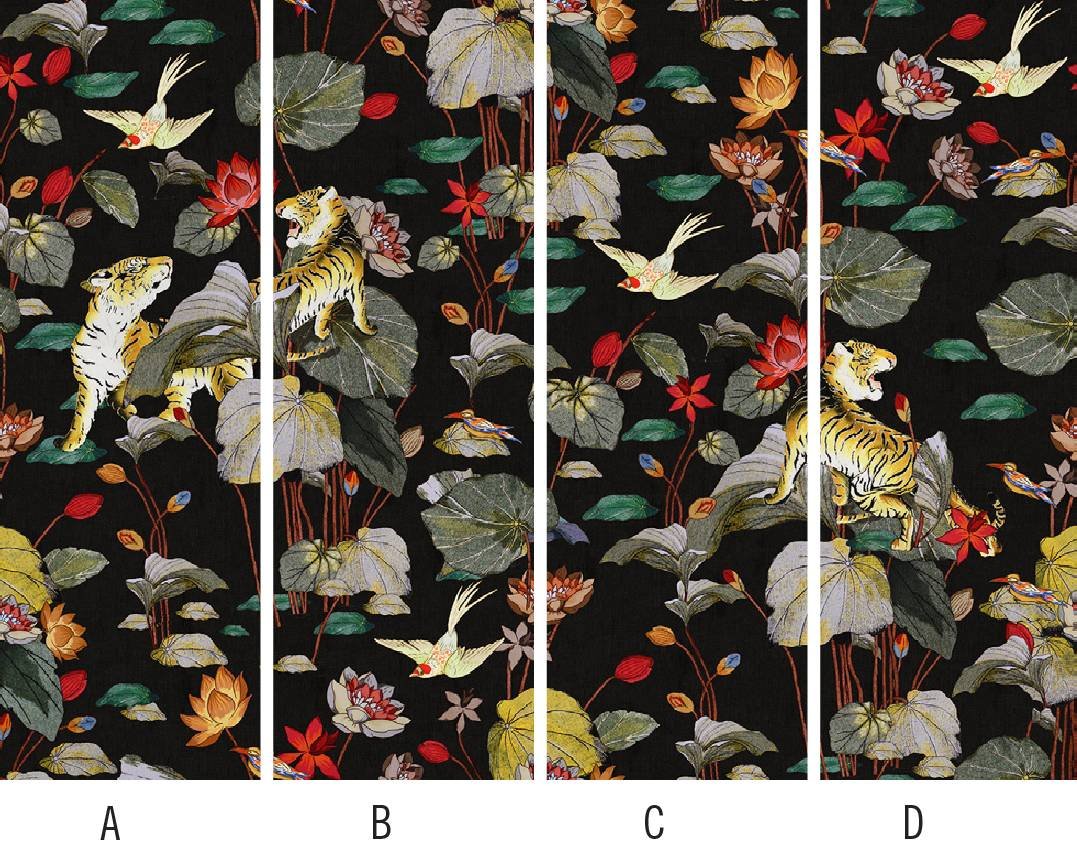
 Image 1 of 3

 Image 2 of 3

 Image 3 of 3


Orpheo Negro
Finishes:
Matte
Glossy
Thickness:
1/2” *Special Order*
1/4”
3/16”
1/8”
Sizes:
39 3/8” x 118 1/8”
39 3/8" x 39 3/8"
19 11/16" x 39 3/8"
Custom
Finishes:
Matte
Glossy
Thickness:
1/2” *Special Order*
1/4”
3/16”
1/8”
Sizes:
39 3/8” x 118 1/8”
39 3/8" x 39 3/8"
19 11/16" x 39 3/8"
Custom
Finishes:
Matte
Glossy
Thickness:
1/2” *Special Order*
1/4”
3/16”
1/8”
Sizes:
39 3/8” x 118 1/8”
39 3/8" x 39 3/8"
19 11/16" x 39 3/8"
Custom
INSTRUCTIONS BEFORE INSTALLATION
This collection is designed for use on both interior and exterior walls. This technology achieves high-level aesthetic and chromatic results; however, installation and cleaning require careful attention. Handle the materials with care during installation to avoid impacts or scratches from tools and sharp objects. The manufacturer is not liable for any damage caused by impacts or rubbing. Consequently, no complaints will be accepted after installation.
INSTALLATION INSTRUCTIONS
Before adhering the panels to the wall, verify which side is meant for placement and ensure the design aligns with adjacent panels. Use adhesives such as H40 No Limits by Kerakoll, Ultralite S2 by Mapei, or other adhesives with similar technical properties. Seal joints with cementitious fillers or neutral silicones only—epoxy fillers are not recommended. Remove any excess filler immediately with water and avoid using abrasive sponges.
Apply adhesive using a notched trowel with at least a 5 mm notch to the wall and press the panel into place. As this is an interior application, there is no need to apply adhesive to the back of the panel. For a more aesthetically pleasing result, we recommend maintaining a joint width of only 1 mm. Avoid mechanical self-leveling systems, as their removal could damage the surface. Use a rubber spatula to press the slabs into alignment.
Before beginning installation and grouting, check the material’s graphics and start installation at least 4 mm above the floor to ensure level placement. Protect the slab edges with paper tape before grouting. Remove the tape slowly within 30 minutes of grouting and/or painting. When removing tape, avoid using metal tools (like cutters or spatulas) that might mark or damage the slab. Clean any grout residue with water and a non-abrasive sponge.
CUTTING AND DRILLING INSTRUCTIONS
Ensure you work on a flat, clean surface for cutting and drilling. Use a thin diamond disc (1.2 mm thick, e.g., Tyrolit Premium DCT 1A 1R) mounted on a cutting machine guide (e.g., Kera-Cut Di Sigma) or a flexible grinder. Alternative cutting methods may damage the decoration. Drill holes with a non-percussion drill using a tungsten tip, wetting it frequently with water. For larger holes, use continuous band diamond cup cutters with a flexible grinder.
INSTRUCTIONS FOR ORDINARY CLEANING
Clean with water or neutral detergents commonly available. For stubborn dirt, use degreasing detergents, provided they are not highly alkaline. Use neutral detergents or water with a microfiber cloth or soft sponge. Acidic anti-limescale products can be used, but rinse the surface quickly with water after application. Avoid solvents and abrasive sponges.
WARNINGS
While awaiting installation, store products in a dry place, protected from weather conditions, and cover them with protective caps. We are not responsible for materials stored or preserved improperly. We also do not accept complaints regarding materials that have already been installed.
INTENDED USES
Shower Box, Spa, Swimming Pools, Backsplash, External Claddings, Interior Claddings, Restaurants, Hotel, Shopping Centers, Showcases. Not intended for flooring.

